I’ve done a lot of recording at home, and have made a living of it for almost 10 years now. This has led me to do a lot of testing with microphones while recording from home.
I know it can get frustrating if you don’t know what you’re doing, even if you get the best mic. So here I’ll help you solve the most common audio quality problems you might find when making YouTube videos.
Table of Contents
Avoid Built-In Camera Microphones
Most cameras have a built-in mic, so a lot of people tend to think that this is enough to start recording good video.
It is not.
The main problem with built-in microphones is that they are on the consumer level. In other words, they’re low quality.
It’s not just that their sound is not clear, but rather they capture every single sound around you, including air. They are noisy and can’t discriminate any sound.
This happens because they are omnidirectional. The recorded ambient sound can get louder than your voice unless you put the mic near you.
Some omnidirectional microphones are worth it, but only if the situation calls for it.
Get Closer to The Microphone
Getting a unidirectional mic helps a lot with getting rid of noise around you.
However, there’s still noise that is going to come from your direction. This noise will be picked up by the mic and amplified.
That’s why the key to good audio quality is simply to get closer to the microphone.
This is one of the main reasons I prefer to use a lavaliere microphone when I’m at home. Since the mic is very close to my mouth, it picks up my mouth way louder than any other sound.
Even though I’m not technically reducing the noise, my audio sounds pretty clear just because my voice is a lot louder than the rest of the sounds.
Now, let’s talk about one of the main enemies you’ll face when recording at home: echo.
If you don’t fix this before recording with your new mic, all the echo will also be amplified and your audio will sound just as bad, but louder. Ugh.
The Enemy Inside: How to Avoid Echo in Your Room
I used to think that I needed to sound-treat my room with acoustic panels to get rid of the awful echo.
And even though this is, indeed, the way professionals do it, it’s just too expensive and impractical if you’re doing it at home.
You’ll damage the paint on your walls, and spend a lot of money to sound treat all the places that need it.
Instead, what I found works best is to simply put more furniture and decoration in my room.
That’s right, the best fix to an echoey room is a visit to Ikea.
See, the main reason a house room is echoey is when there’s a lot of empty space.
When I started my channel, I had just moved to a new place, and I didn’t get why my room was so echoey.
But once I started putting stuff around the room, the echo started slowly disappearing.
It worked a lot better than the little foam panels I had bought (which, btw, are really inefficient).
So don’t waste your money on those, simply make sure you decorate your room with more furniture and the echo will disappear because it will get lost between all the different surfaces.
Also, make sure your curtains are thick enough if you’re still hearing an echo. Some experts recommend that the heavier and more tightly woven the curtain the better it is for soundproofing a room.
The Enemy Outside: How to Fix Wind Noise
When you’re recording outside, the most common problem you’ll find is the wind.
When winds hit your microphone, it gets so noisy that it’s almost impossible to record anything.
This is very common when recording travel vlogs.
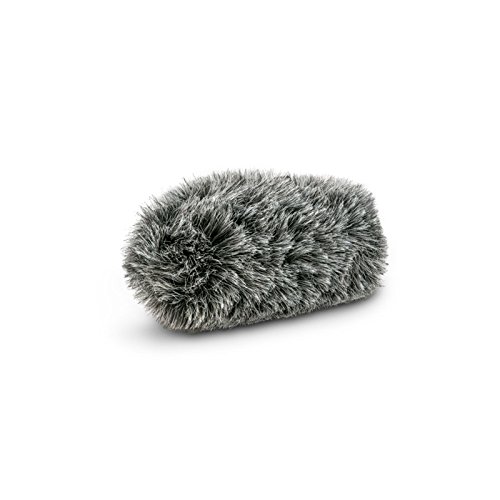
That’s why you need a windscreen. They come in different shapes, depending on the microphone that you use.
Be it that you’re using a lavaliere, shotgun, or your camera’s internal mic, you’ll need to buy one according to the type of mic you’ll use.
Funny tip, the windscreen version for shotgun mics is often called deadcat — creepy name, I know.
Use the Power of Editing
Warning: this is your last resort.
After you’ve done everything else, the only thing left is to apply a denoiser or noise suppression filter in your editor.
Most of them can do a great job of neutralizing the natural static that your mic recorded.
If you’ve done the previous steps right — getting closer to the mic, making sure your room is not too empty, and using a windscreen outside —, applying a denoiser will make your audio almost pristinely clean.
Just make sure you don’t overdo it.
Your objective is to get rid of as much noise as possible BEFORE recording and applying a denoiser.
Denoising is pretty good, but it’s not magic. If there’s too much echo and background noise, you’ll only make it worse with a denoiser filter.
The best rule to follow when recording audio is to make sure that the recording itself is as good as it can be. Fixing it in postproduction is just like pressing the big red emergency button, and you should avoid it at all costs.
Follow the instructions in this guide, and you won’t need to use the power of editing at all. Good luck!
Will has been a full-time content creator since 2014. He’s an audio, video, and tech hobbyist dedicated to reviewing products and giving you the best tips he knows to grow your audience.