
GoPro cameras can be useful assets in situations in which you’d think wouldn’t be possible to record video properly. They’re small, easy to handle, resistant, and most of the time, waterproof.
Those characteristics can help you to get some cool videos in some of the most adventurous circumstances. And doing that, some questions may occur to you, such as: what if I wanted to attach my GoPro to a helmet? Could I do that?
And the answer is: sure you can! We’re going to tell you how to do it and clarify some of the most common doubts related to the process.
Table of Contents
- How Do You Mount a GoPro to a Helmet? Step By Step
- Where is the Best Place to Put a GoPro on a Helmet?
- Do I Need The Official GoPro Helmet Mount?
- Cheaper Alternatives to GoPro Helmet Mount
- How to Mount a GoPro to a Helmet With a Low Budget (DIY style)
- Is it Safe to Mount a GoPro on a Helmet?
- Will the GoPro Fall Off my Helmet? How To Make Sure It Won’t
- Is it Legal to Mount a GoPro on a Motorcycle Helmet?
- Do GoPro Adhesive Mounts Come Off?
- Can GoPro Adhesive Mounts Be Reused?
How Do You Mount a GoPro to a Helmet? Step By Step
1. Prepare Your Helmet
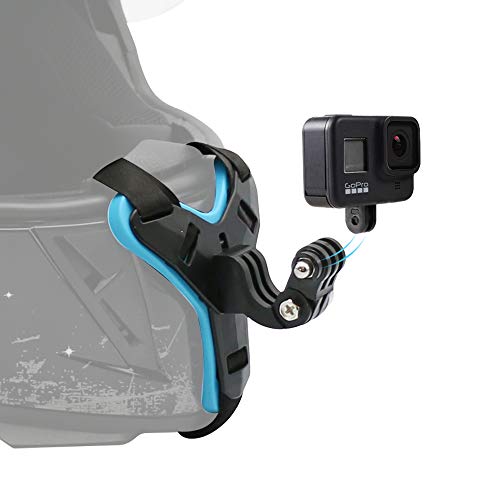
After getting your hands on a helmet, the next thing you must do is prepare it in order to properly attach the GoPro to it. For that, you’ll need an adhesive mount.
Adhesive mounts can be flat or curved. The type of mount you should choose depends on the position you want to place it on the helmet, as well as the type of surface you’re placing them into. Just to be safe, when buying a mount, just get one of each so you don’t have any major problems.
To attach the adhesive mount to your helmet, you’ll need:

- A flat or curved GoPro adhesive mount
- A GoPro quick release buckle
- Isopropyl Alcohol
- Pencil
- Measuring tape
Having those in hand, you’ll then have to choose the place in the helmet you’re gonna put the adhesive mount on and analyze if it’s a better fit for a curved or a flat one.
You’ll have to make sure that, regardless of being on the front, top, or even sides of the helmet, your GoPro it’s in a centered position. That’s why you’re going to use the pencil and the measuring tape. Localize the centered position with the help of the measuring tape and then mark the exact spot with a pencil so you can properly place the mount.
2. Place Your Adhesive Mount
Put a little bit of the isopropyl alcohol mixed with water in a dry cloth and use it to clean the surface of the helmet. Make sure you clean up nice and slow — you don’t want any kind of dirt between the mount and your helmet since this type of thing can weaken the gluing process.
Once your helmet is clean, carefully apply the adhesive mount in a centered position you prefer. After the mount’s placed, put a little bit of pressure on it to make sure it sticks firmly. You can use just your bare hands or a small and heavy utensil for that.
3. Fit Your GoPro Camera in the Mount
With the quick-release buckle, fit the camera to the adhesive mount you just placed. Put the camera at an angle of your choosing (facing the front, yourself, up or down) and you’re ready to go!
Where is the Best Place to Put a GoPro on a Helmet?
That depends. As we’ve said, it’s always best to make sure the camera is in a centered position. However, that can be in the front, on the top of your helmet, or on the sides — what the hell, it can even be in the back if your intention is to record the people behind you or something like that. The truth is: it has to be according to your circumstances.
Derek Hallman published a nice video with the different placements and angles you can get with them. Here you can see all the options:
For example, if you want some selfie portrait angles, then it would certainly be more practical to place the camera front and center on your helmet. For these types of shots, you could also use a G buckle type of mount and extender bars, that would extend the reach of your camera and help you to capture a better (and not so close) angle of your face.
If you want to focus on the surface you’re riding/sliding/driving in, then you should also place it front and center, but with the camera looking down.
If your helmet is a full face or a modular one (or any type of helmet with a chin region), you could try to place the camera right beneath your chin to get some cool and intense self-portrait angles while you’re riding as well.
Anyway, the possibilities are endless and go according to the type of helmet and the type of shots you want to record.
Do I Need The Official GoPro Helmet Mount?
You don’t need the official mount. There are plenty of off-brand mounts that work too for a lower budget.
With the official GoPro helmet mount, however, there’s an advantage:
The official helmet mount comes with a swivel mount. This will add a ton of flexibility to your angle possibilities when recording with your GoPro. With the camera locked in on this mount, you can move it to the sides, up and down, or even spin it, pushing the boundaries of the recording experience and enabling you to produce a very dynamic video.
Cheaper Alternatives to GoPro Helmet Mount
The official GoPro mount tends to come with the traditional mounting options, but if you wish to diversify a little bit, there are some options you can go to to get some alternative angles and test other attachment options to your helmet.
1. Helmet Chin Mount
This type of mount is going to provide a crazy-intense angle for your recording. Providing an angle that simulates the POV of the person wearing the helmet, the video experience produced by this mount is extremely realistic.
The chin mounts you can acquire, outside the official GoPro options, are specifically designed for you to fit in the chin region of your helmet (it can’t be an open face or half helmet, obviously). You usually attach the mount to the helmet through a high-quality bonding tape, which makes the gluing of a flat or curved mount unnecessary in this case.
You’re most likely to enjoy the equipment at its finest when practicing sports that involve being at a high speed.
2. Vented Helmet Strap Mount
This type of mount is recommended if you want a more practical attachment/detachment process when fixing the camera to your helmet. With this mount, you’re going to velcro-strap the camera to the helmet.
This mount is compatible with all kinds of helmets that are vented, ‘cause is precisely through those venting holes that you’re going to attach the mount to your helmet.
The kind of angle the positioning of this mount is going to provide (up and center) offers a more vast view of the ambiance, with frontal images that are similar to a POV shot, but not quite the same as one.
How to Mount a GoPro to a Helmet With a Low Budget (DIY style)
If you’re a little bit short on money at the time, the cheapest way to attach your GoPro camera to your helmet safely is with a vented helmet strap mount.
You can purchase one of these separately from a more complex mounting system and use it to strap your GoPro camera in a more practical manner to your helmet. They are, of course, cheaper than the usual mounts, and can offer you some nice angles through their positioning on the helmet.
Usually, this kind of mount is used to strap the camera on the top and center of the helmet (using the holes on top of the vented helmets), however, there are some tutorials online that teach you how to accurately place the strap through the chin area of modular or full-face helmets, obtaining a POV angle for your recording.
Is it Safe to Mount a GoPro on a Helmet?
If you’re following the recommended methods, nothing is unsafe about it.
Just don’t try to do some crazy stuff, like:
- Somehow try to attach your camera to the helmet using hot glue. The glue from the adhesive mount is the only glue you need to properly stick the mount to your helmet firmly and safely.
- Put the camera way too close to your eyes. In case you fall while riding, biking, skating or whatever, the camera smashing right into your eyes as you fall wouldn’t be the sweetest thing, would it? Just try to maintain a safe distance there.
Will the GoPro Fall Off my Helmet? How To Make Sure It Won’t
If you properly apply your adhesive mount to your helmet, you shouldn’t worry about falling off for quite some time. The estimated time that most adhesive tapes have before starting to loosen up is about 24 months.
Once you reach that time using the same mount, you should consider changing it, if you want to be really safe about it. You could test the firmness of the glue simply by trying to move the mount around with your hands. The mount shouldn’t move at all, but if it does, then it’s probably time to change it.
However, when sticking the mount to the helmet, one thing you can do to be extra sure it will properly stick to the helmet surface, it’s to (right after you put the mount in your preferred location) use some c-clamps or spring clamps to sustain pressure into the adhesive mount for about 4-5 hours.
If you don’t have any type of clamps, you can just try to improvise using a heavy object that could get in that pressuring position and stay there for that amount of time.
Is it Legal to Mount a GoPro on a Motorcycle Helmet?
Warning: I’m not a lawyer and this is not legal advice. You should ask a local lawyer to make sure everything is completely legal as countries and states have different laws. Do it at your own risk.
But usually, GoPro cameras attached to motorcycle helmets don’t seem to be a problem to law enforcement. It’s important to say most of the motorcycle drivers that use cameras on their helmets do it because if they get involved in any type of accident, the drivers can properly capture the occurrence and clarify what happened to a law enforcement agent, if necessary.
However, that are some things that can get you in trouble with the law when riding with a GoPro attached to your helmet, such as:
- Placing the camera in a way that covers a portion of your vision of the road/street or doesn’t let you fully close the visors of the helmet. If a police officer sees that, there’s a chance he’ll stop you for it and give you some sort of warning that will depend on the mood he’s in.
- Recording faces of people without their consent. If your intention is to do some content for YouTube or any other kind of online video platform, make sure that, if you film people’s faces, you’re doing it so with their consent. Otherwise, that can get you into some unwanted legal problems.
Do GoPro Adhesive Mounts Come Off?
Yes. I mean, the way to do it it’s kinda usual, but yes, you can.
To safely and properly remove the adhesive mounts from the surface of your helmet (or any surface for that matter), you’re going to need: a hairdryer. Yep, that’s about it.
Turn on the hair dryer and aim it at the adhesive mount for about 3-5 minutes. You can check every couple of minutes to see how the de-gluing process is going and, once you think it is loose enough to get it out, just fit the buckle mount in there to ease up the process and pull the adhesive mount away from the surface.
If you don’t have a buckle mount at hand at the moment, you can try to use just your hands or a sharp material that’s within reach.
It can happen that only the mount comes off but the adhesive stays on the surface, but don’t worry, you can use your fingers to carefully remove the adhesive from the surface and get rid of it entirely.
Can GoPro Adhesive Mounts Be Reused?
Unfortunately, no.
However, Scotch has its own line of reusable, double-sided adhesive tabs that you can fit into your adhesive mount once you remove it from a surface.
The packs usually come with 15 fresh tabs that you’re free to use, also at a pretty affordable price. However, the quality is not as consistent as a 3M adhesive (which is the one used in the official GoPro mounts), so don’t expect one of these reusable tabs to last as long as an original GoPro adhesive.
Will has been a full-time content creator since 2014. He’s an audio, video, and tech hobbyist dedicated to reviewing products and giving you the best tips he knows to grow your audience.